The following are more detailed step-by-step instructions on how to use ThriveItApp
Detailed instructions:
App opens to catalog page and is accessible by tab on the bottom of screen 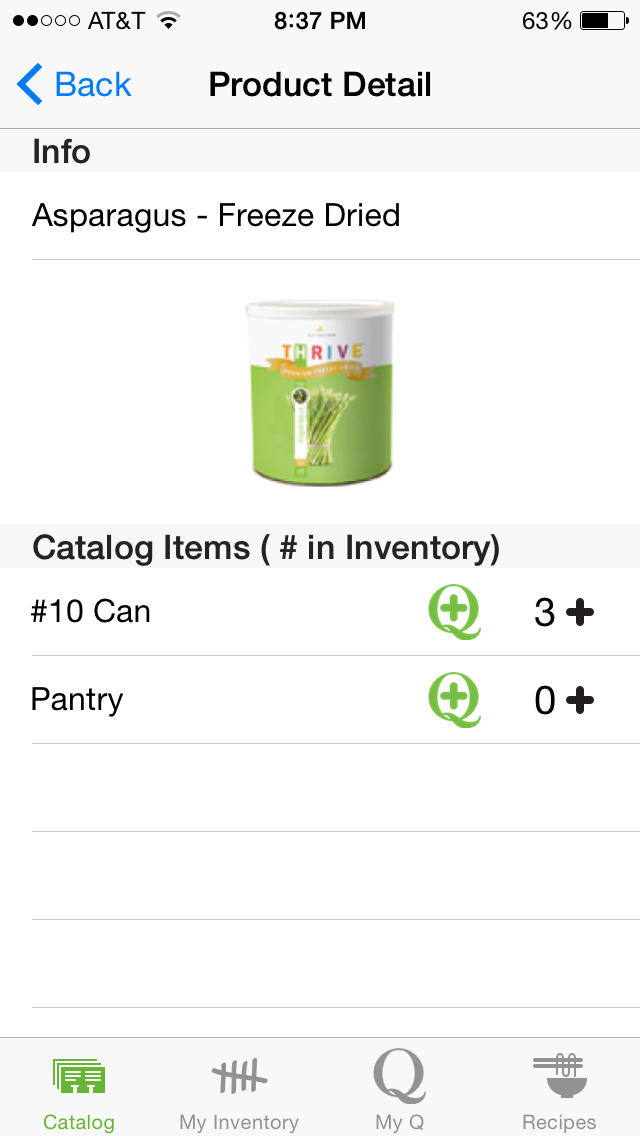
Catalog of food products
- Tapping the name of the product takes you it’s page on Thrivelife.com (you will leave app)
- Tap on picture of product to see the label
- Zoom in to see details
- Tap Done to return to product page
- List of available products (sizes)
- Green Q with a plus allows you to add to your Q wish list (not currently connected to your actual Q)
- Number on right indicates how many of that product you have in inventory.
- You may add to your inventory by tapping the +
Access your inventory by tapping My Inventory tab at the bottom of screen
You may populate your initial inventory:
- by using the method above: entering each item by tapping the + at the end of the line item in the catalog
- Import inventory using a preformatted spreadsheet. Template available here.
- Complete spreadsheet according to instructions
- Email file to your iPhone
- Open email, hold finger on attached file until dialog box appears
- Choose “Open in ThriveItApp”
- Go to Menu -> Manage Data
- Tap the i at the right end of the line item for the new file under Inbound Files
- Tap Replace
- App will confirm number of records imported
- Tap OK
To remove an item from inventory
- If the item was entered by mistake or is being actually removed from inventory (sold, traded, gift, etc.) swipe the line item to the left to display the Delete button. This will remove the item from your inventory.
- If the item has been used and is being removed from inventory because it is empty, tap the line item to go to Inventory Detail and slide the Percent Full to zero. This will remove the item from your active inventory but keep the data.
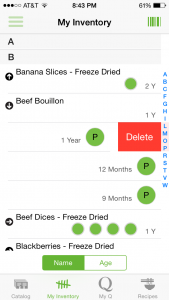
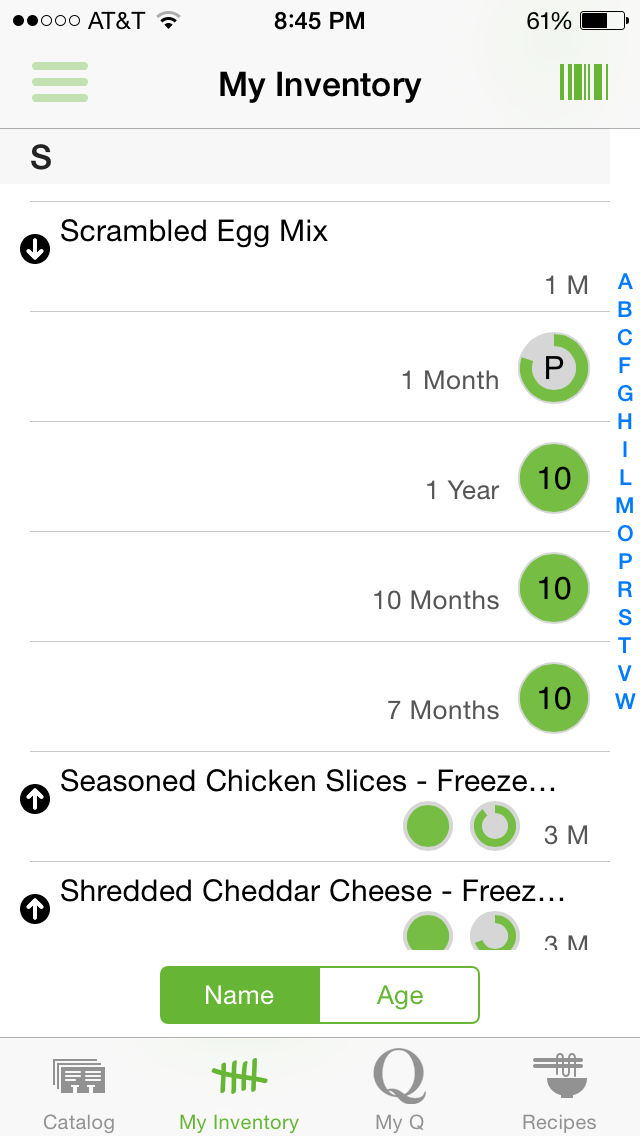
Catalog items in your inventory will be listed in alphabetical order
- One to many “cans” of an item will be displayed as circles under the product name.
- The circle on the right represents either the oldest unopened can or an open can.
- Tapping the right-pointing arrow next to the product name will expand the list of items for that product.
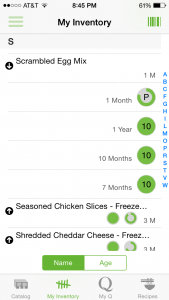
- Each item will display a length of time
- If item is unopened, the time will start from date it was stored
- If item is open, the time will start from date it was opened
- Items will be listed open cans first then from oldest unopened to newest.
- Each item will display a colored circle with the size represented (P= Pantry, 10= #10, S= Spice Can etc. )
- A solid color green indicates that it has not been opened
- A grey ring with colored dial indicates an open item and the amount of color indicates how full.
- The color of the ring indicates not only the fullness, but provides coding for aging of the opened can.
- Green has been open less than 6 months
- Yellow has been open 6 to 9 months
- Orange has been open 9 to 12 months
- Red has been open 12 months or longer
- Each item will display its location to the left of the circle (if entered by user)
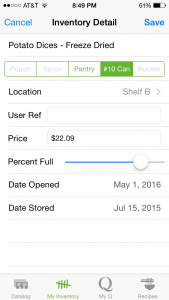
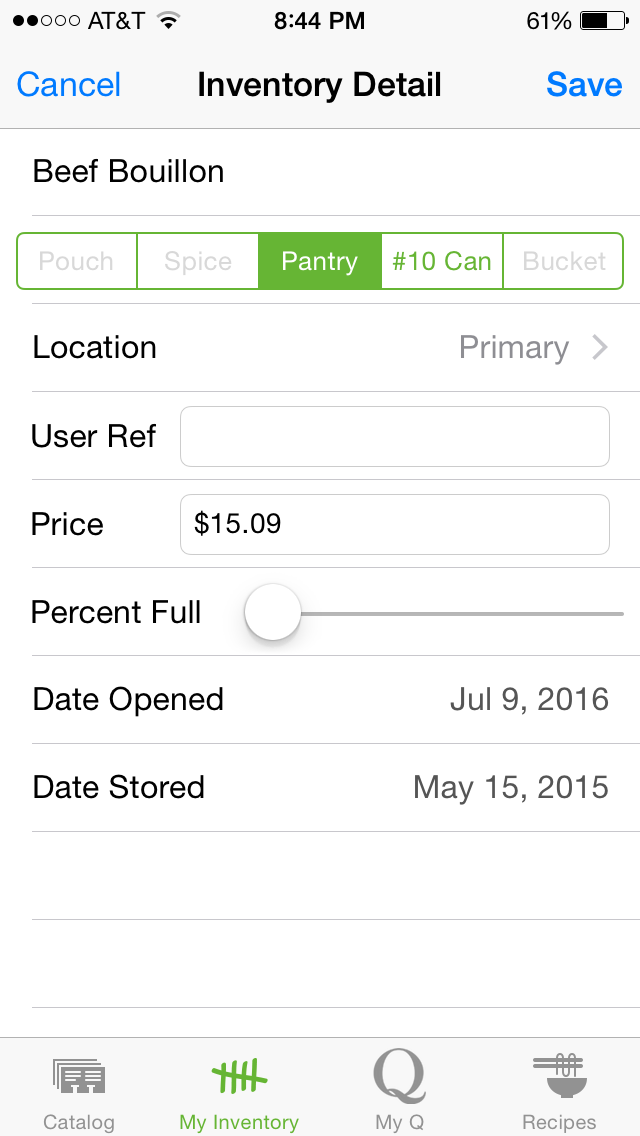
- Tap line item and you will go to inventory detail.
- Top line defaults to size of item in inventory. May be changed if needed.
- Set a location for the item (garage, pantry, Rack A, etc.). These locations set by user, but added to list for consistency and convenience.
- User Ref is available for you to make your own notes
- Percent Full may be dragged to indicate an approximate amount in the can
- Reducing from 100% will set the open date of the can to that date. You may edit the date.
- Date opened – enter the date when you open(ed) a can (if didn’t use % slider)
- Date stored – the date that the item was added to inventory (can be edited if needed)
- When can is emptied, drag % slider to zero and save. Can will be removed from list but stay in inventory history.

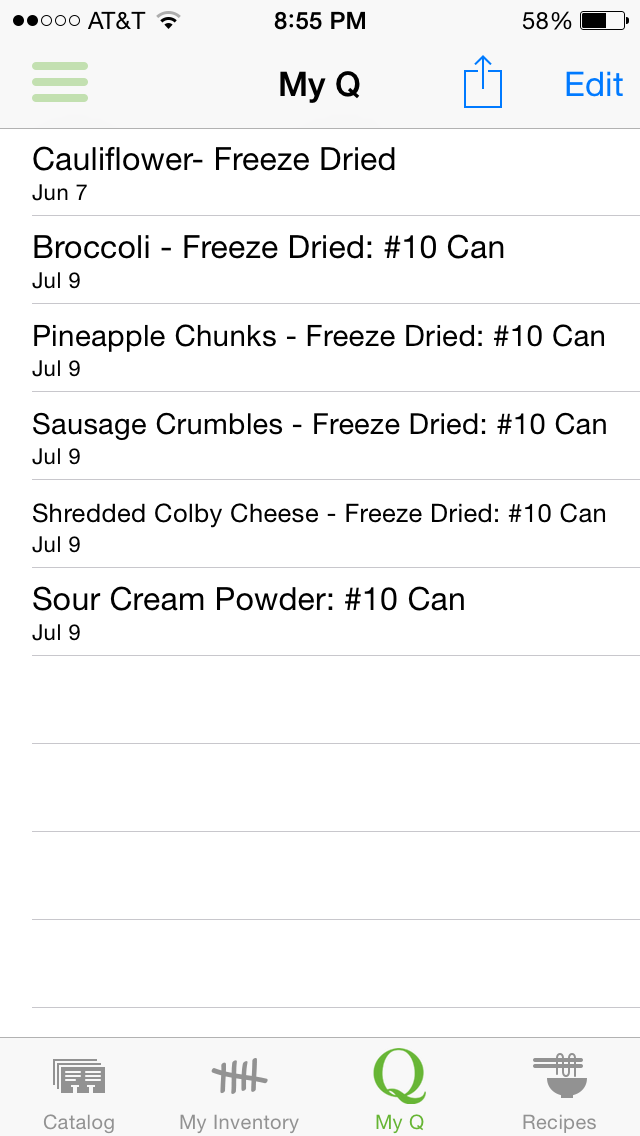
My Q tab on the bottom of the screen takes you to a list of items you have added to your Q wishlist.
- Product name and date added to list are shown

- To remove an item, swipe the item from right to left and get a delete button
- To remove one or more items, tap Edit in upper right hand corner and list will have delete buttons on each line.
- To change the order of items in your list, tap Edit
- Tap the Reorder icon on the right side of any product and drag that line item up or down to where you want it.
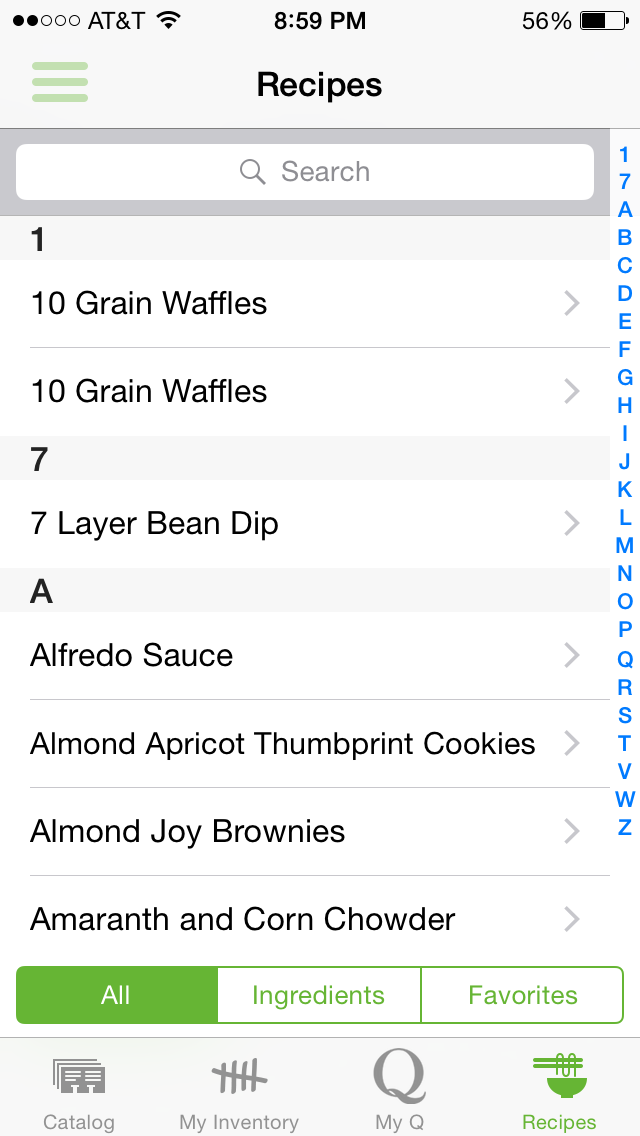
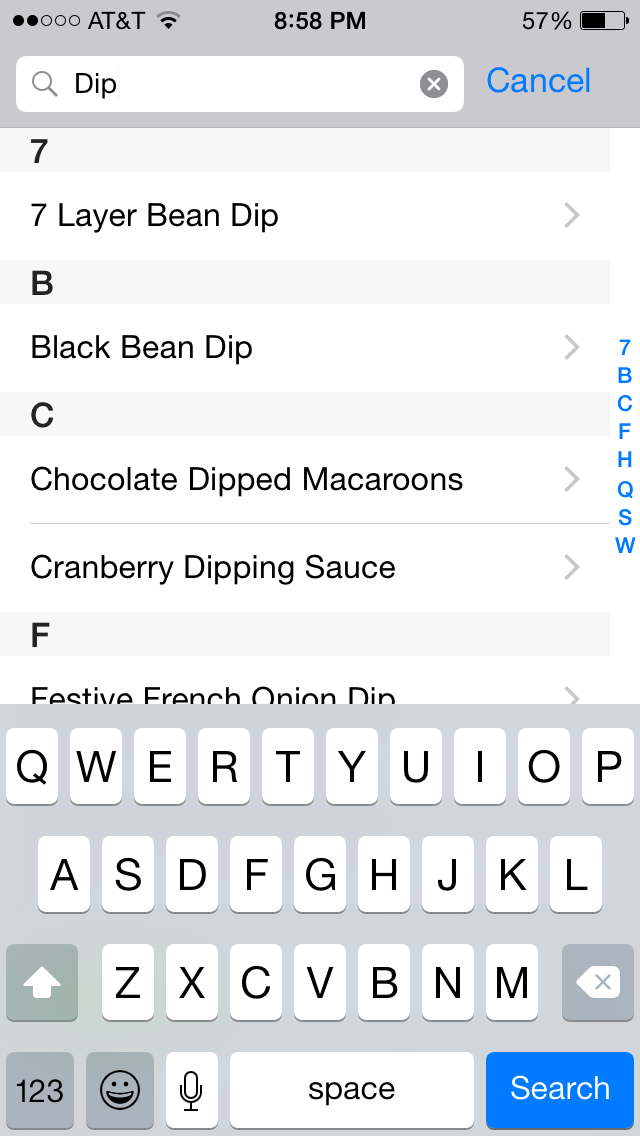
Recipes tab on the bottom of the screen takes you to an alphabetical list of Chef Todd’s recipes that are listed on the Thrivelife.com web site (if a recipe is listed twice, it is on the web site twice).
- There are several ways to search the recipes:
- Search bar at the top allows you to search for specific key words in the recipe title

- Use alphabetical listing on right column to search by first letter of recipe name
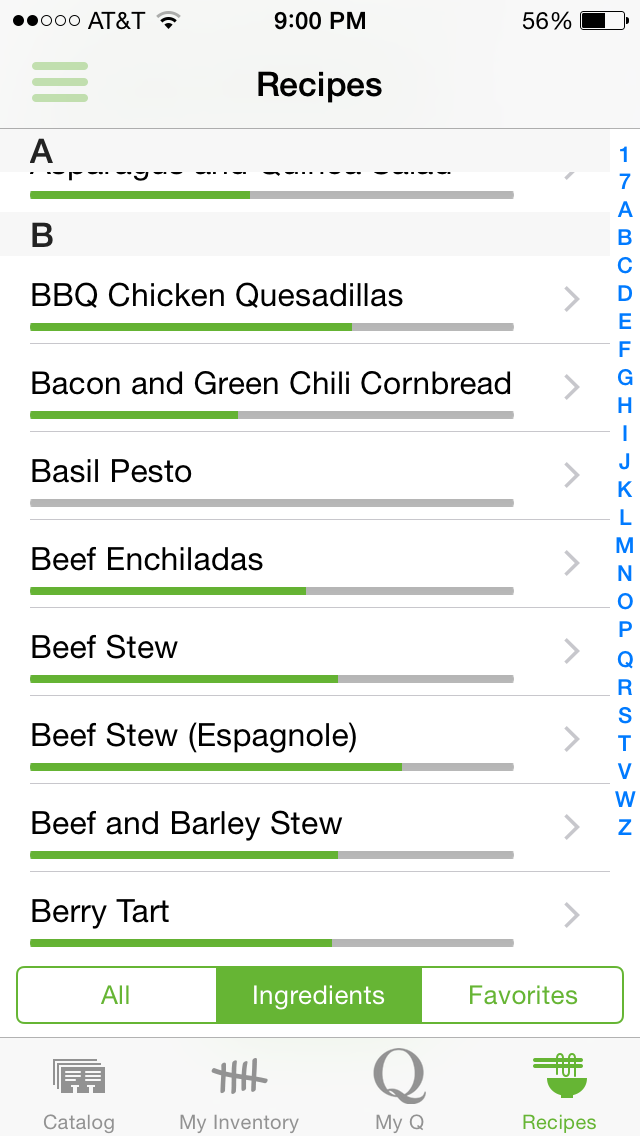
- Tap Ingredients on the bottom menu to display recipes that have ingredients in your inventory.
- Tap Favorites to list only recipes you have marked as a Favorite
- Tap All and scroll through the entire list to see what looks good!
- Search bar at the top allows you to search for specific key words in the recipe title
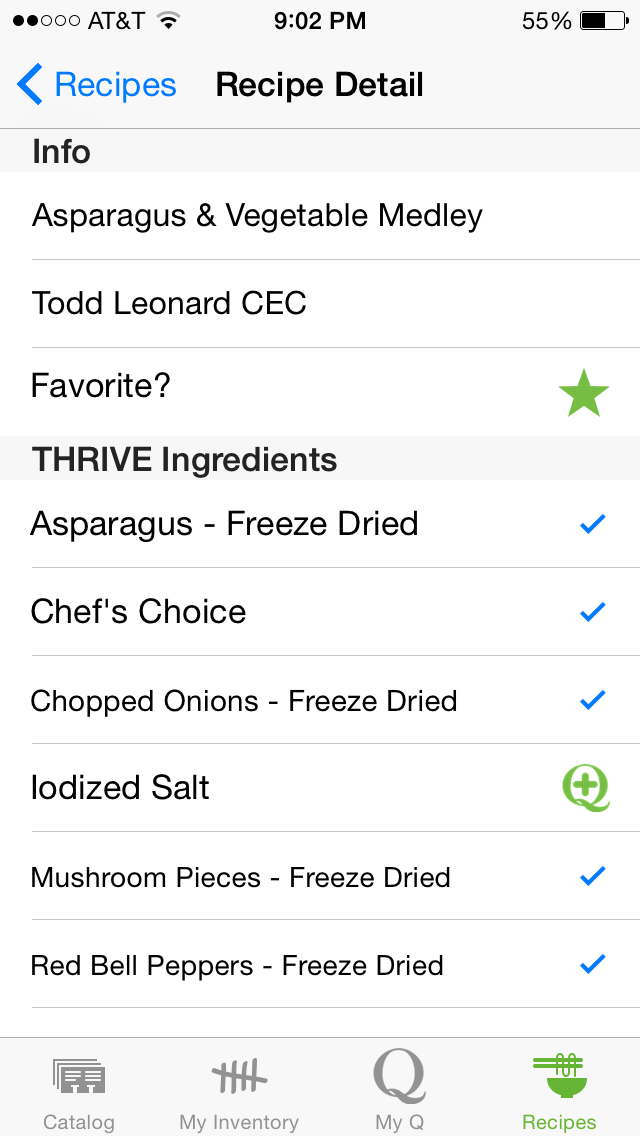
- Once you find a recipe you like
- Tap name of recipe for more info
- Recipe detail page lists recipe name and creator
- Option to add to your favorite recipes by tapping star
- List of Thrive ingredients
- Ingredients in your inventory will have a check mark
- Ingredients not in your inventory will have a Q with a + so that you can add it to your Q wishlist
- To get the actual recipe and see non-Thrive ingredients, tap the recipe name. You will be taken to that recipe on the Thrivelife.com site (you will leave the app).
- Tap name of recipe for more info
Top left corner tap Menu icon to get to:
- About shows copyright and version

- Settings is currently a placeholder for future feature(s)
- Manage Data
- Edit locations
- tap edit locations and get a list of locations with the option to Add New location(s)
- To remove a location, swipe the line item from right to left and get a delete button
- Inventory
- Import .csv file with existing inventory using a preformatted spreadsheet. Template available at bonpetiteapps.com/thriveitapp/xxxxxx.xls
- Complete spreadsheet according to instructions
- Email file to your iPhone
- Open email, hold finger on attached file until dialog box appears
- Choose “Open in ThriveItApp”
- Go to Menu -> Manage Data
- Tap the I at the right end of the line item for the new file under Inbound Files
- Tap Replace
- App will confirm number of records imported
- Tap OK
- Back up your inventory to a file
- File will have date and time stamp
- Choose file and press the box with arrow pointing up at the top right corner to email file
- eMail to yourself or someone else.
- Edit locations
- Metrics is currently a placeholder for future feature(s)
- Help – takes you out of the app to the Bonpetiteapps.com web site FAQ page.
